NBI clearance online application – If you’ve keyed in ‘How to apply NBI Clearance online’ on your laptop or smartphone, then you are in the right place. Many people would love to apply for their NBI Clearance online without knowing where to start, or even the link to use. Our article will give you a comprehensive and detailed guide on how to go about this. The process is a simple one, but if you incur any problems during the process, feel free to leave a comment, and we’ll be sure to reach out.
Table of Contents
What is NBI Clearance?
NBI stands for National Bureau of Investigation which is the primary agency established by the Philippine government.
NBI Clearance certification issued by NBI proves that you are a good resident and are not involved in any criminal activity in the Philippines.
Filipino nationals (including the Philippines residing in the foreign nationals) applying for jobs, studying abroad, taking the civil service exam, or starting a business are required to provide NBI Clearance certification.
Requirements for an online NBI Clearance application?
Today, we can apply NBI clearance online without visiting NBI Branch. But we need to prepare below documents before applying online.
1 . two valid government-issued IDs
UMID
Police clearance
Passport
Voter’s ID
GSIS ID (ID)
SSS ID (UMID)
Expired NBI Clearance
TIN ID
Driver’s License
PhilHealth ID
PRC License
PAG-IBIG ID
Postal ID
NSO/PSA Authenticated Birth Certificate
Certification from Local Civil Registrar
Solo Parent ID
Senior Citizen ID
2. For first-time job seekers – Barangay Certification
Barangay Certification proved that you are a good resident in the barangay and have no criminal record. You can apply and get the Barangay Certificate or Barangay Certificate of Residency as a first-time job seeker.
NBI Clearance online application for 2022: Step by step guide
With that said, let’s begin.
The NBI clearance includes the applicant’s name, date of birth, place of birth, and current address, as well as the purpose of applying for the clearance form. The entire process is divided into five major steps:
- NBI Online Application
- Submitting the Valid ID Requirements
- Scheduling an Online Appointment
- Payment for the Registration
- Processing and releasing your Application
1. NBI Clearance Online Application
Before you begin the application process, ensure that you have a stable internet connection and a computer or smartphone. The process should take only 15 minutes approximately. You can perform the Application at any time of the day or night.
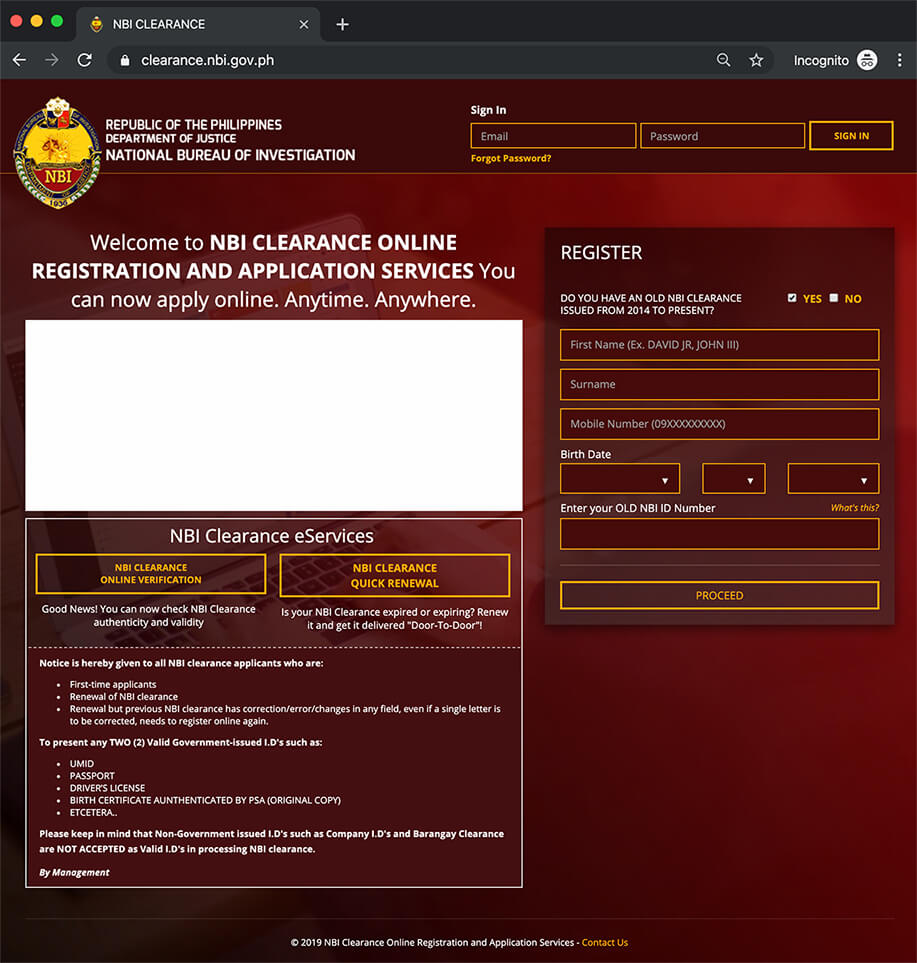
The first step is to sign in using the Philippine Department of Justice NBI Clearance website. Here is the link to the site
Upon opening the page, you’ll be prompted to accept the terms of service before proceeding on. Click ‘I Agree’ followed by ‘Close’ to display the contents of the page.
Sign Up for a New Account
On the upper right-hand side of the page, there is a section for signing in. If you don’t have an account, then you are required to sign up (register) for a new account. You need to fill in and complete the registration form before proceeding to the next step.
>>NBI Clearance Online Registration
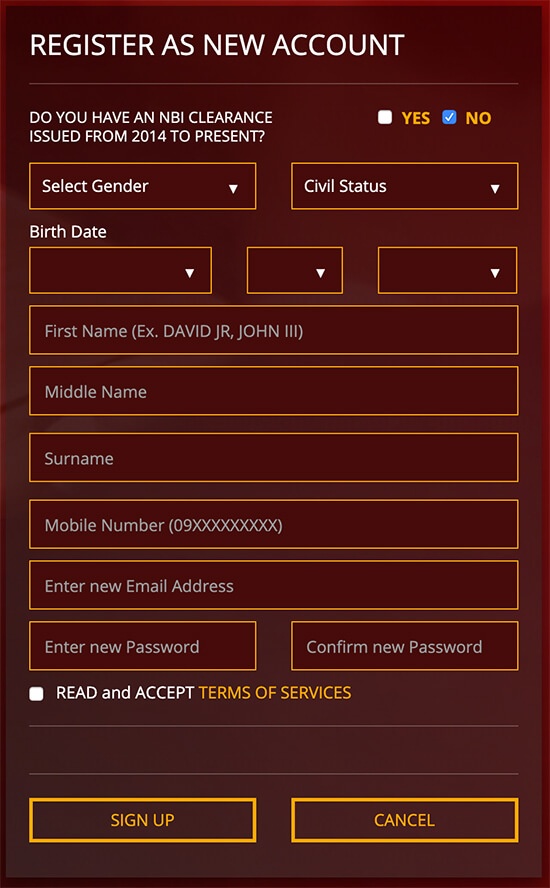
The section requires you to fill in your personal information. Upon completion, you need to tick the ‘Read and ACCEPT TERMS OF SERVICES’ and then click the ‘SIGN UP’ checkbox to complete the registration. Don’t forget to tick ‘NO’ at the section asking if you already have an NBI Clearance (as shown in the pic below).
One Time Password
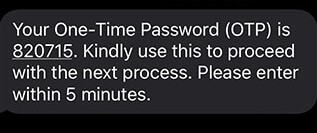
A One Time Password (OTP) will be sent to your phone number, and you’ll need to enter the code before proceeding. This is simply to prove that you are not a robot and to protect the application process. Your OTP will be sent to the email address or phone number that you used to register with. If you don’t receive the OTP, click on resend again. Make sure you used the correct email address and phone number when signing in.
Also, ensure that you insert the code correctly, or you’ll be forced to repeat the steps above.
Here is a sample of the OTP send via mobile.
If the registration is successful, you’ll receive a notification as approval for you to continue with your registration.
Filling up the NBI Clearance Form
The next step is to fill up the NBI Clearance Form. Kindly note that this isn’t a repetition of the registration form that you filled out earlier, but rather a continuation. The information that you fill here is the one that will reflect on your printed NBI Clearance form.
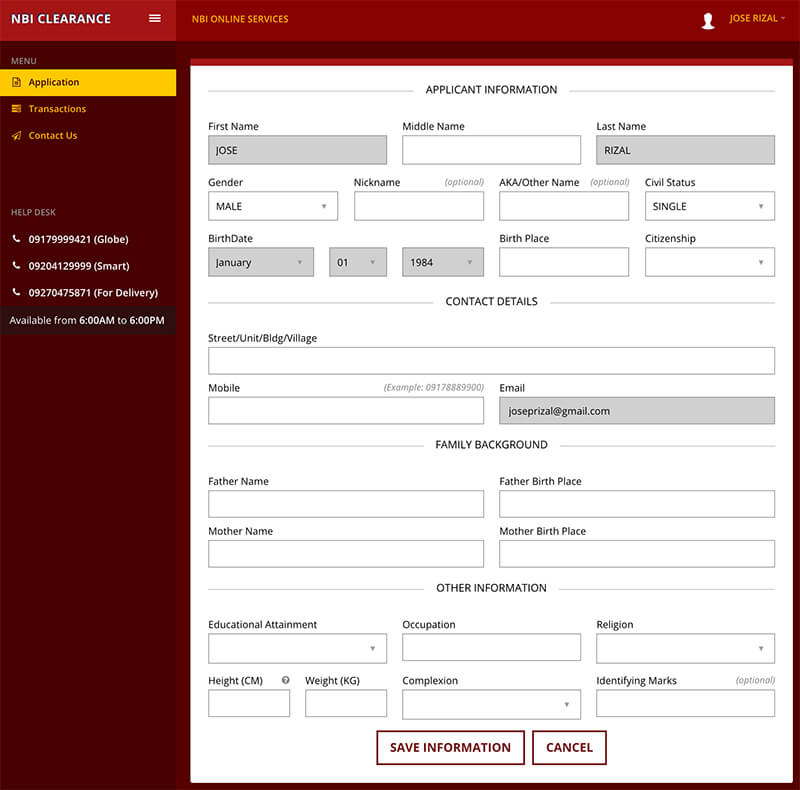
At the bottom of the page, there is a ‘SAVE INFORMATION’ button. Clicking it will showcase a summary of the information you have filled. This is your opportunity to double-check and change any wrong information. There is an ‘EDIT’ button for this. If everything is in check, click the ‘APPLY FOR YOUR CLEARANCE’ button.
Some of the information that you will be required to fill are as outlined below:
Once everything is correctly filled, click on the ‘APPLY FOR CLEARANCE’ button to proceed with the Application.
Completing these steps are only the beginning of dealing with your NBI Clearance form- but the most important ones. The next steps will include submitting valid requirements for the NBI Clearance, scheduling an appointment for the NBI Clearance, Paying for the registration, and finally processing the final documents.
2. Submitting the Valid ID Requirements
After you have clicked the ‘APPLY FOR CLEARANCE’ button, a new window will pop up, asking you for a Valid ID that you’ll be presenting during your scheduled appointment. Some of the documents accepted include National ID, Passport, Driver’s License, SSS ID, Philhealth, PRC License, Postal ID, School ID, Senior Citizen Card, Tax Identification Number (TIN) ID, GSIS UMID, Alien Certificate of Registration, NSO Authenticated Birth Certificate, and Copy of Previous NBI Clearance.
3. Scheduling an Online NBI Appointment
Scheduling your appointment online makes the online Application easy. This step allows you to set up an appointment online prior to visiting the NBI Branch.
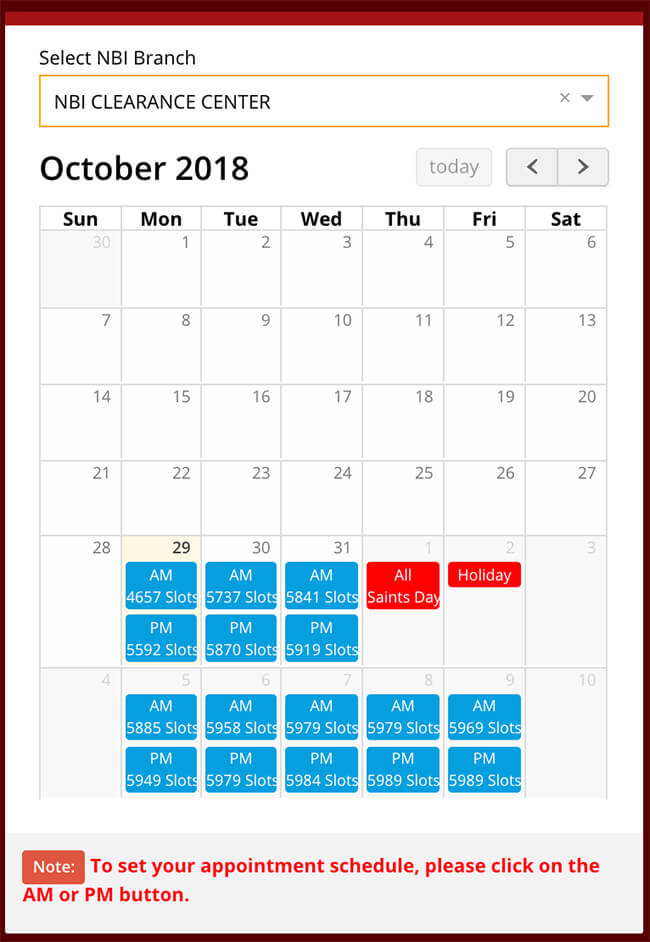
Choose an NBI Branch where you would like to request your NBI Clearance. This is a branch that is nearest and most convenient to you.
After picking the branch, you will then insert the date and time. Pick the preferred day from the calendar. The available dates are highlighted in blue color. There are two slots for each day- AM and PM. Choose the time that is most appropriate for you to visit the NBI branch.
4. Payment for the Registration
After successfully scheduling the appointment, the next step is to pay for the registration. There are seven different payment method options for you to choose from:
Choose the method that is easiest and most convenient for you from the list. In our opinion, we would rather that you go for 7-Eleven. Bayad Center is also another great option as its branches are well spread throughout the country.
The online bank allows you to pay for the NBI Clearance using your bank without leaving your home. Be sure to cross-check with your bank if they offer the NBI Online payments.
The least favorite method is availing yourself to the bank. For starters, there are normally very many people at the bank, and you’ll end up spending loads of hours there. The long queues are normally a turn-off.
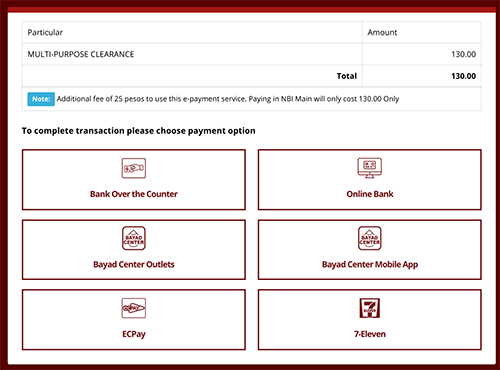
You’re only allowed to choose one of the seven methods. A small window will then appear prompting you to press the ‘Proceed’ button. Another window will then appear, showing you a summary of your transaction and the cost of the clearance. It is important to note that this isn’t the final clearance fee. There are other charges to be incurred, which will change the final amount. Press the ‘Proceed to Payment’ button.
Another small window will then appear with the NBI Reference Number. Note the number down as you will present it to the payment center. You will present this number to the cashier for your registration to be encoded and processed.
After you’re done, check the status of your NBI Clearance, it should have turned from ‘Pending’ to ‘Paid.’
5. Processing your Application
This is the last step where you are required to present yourself to the NBI Clearance Branch as per the date you stated earlier on. When you go to the Clearance Branch, ensure that you have with you your NBI Reference Number and two valid IDs. Failure to have your IDs will end up with you being restricted from the premises.
The processes involved in this last step include: photo capture, taking your biometrics, final verification, and then releasing of your NBI Clearance.
For the photo capture, a passport photo of you will be taken. This photo will be printed on the NBI Clearance. The biometrics part involves your fingerprints being taken. The final verification involves you having a last glimpse and verifying your personal information. This is your last chance to change any information that might be wrong. The staff will guide you through the entire process. Be free to ask any questions if you have any.
Congratulations! You have successfully applied for your NBI Clearance.
FAQ About NBI Clearance Application
Q1:How long is my NBI Clearance valid?
It is valid for 6 months to 12months from the issued date.
Q2:How much is NBI clearance?
Php 130
Q3:How long does it take to process NBI Clearance?
It takes around 5 working days after receipt of the application not including the days in transit.
Conclusion
The process isn’t that difficult, is it? As you might have noted, the only step that requires much of your attention is the NBI Online Application. Everything else is easy. Follow the steps, and everything will be okay.
Leave a comment below if you have any questions, and we’ll be sure to answer them.
