
Looking for the most viable way to save your NBI Clearance Online Application Form? Well, the process is absolutely no brainer.
When applying for an NBI Clearance Form Online, a copy of the final draft is saved in the agency’s databases. You can log in to your account and access the draft anytime. You can also access the EDIT INFORMATION button and review anything you deem not fit on the draft. On the other hand, the PRINT ICON makes it possible to make several print-outs whenever you want duplicate copies.
That said, you may not necessarily need to save your NBI Clearance Form Online when done with the registration or renewal process. However, to be cock-sure that you have saved the soft copy, we will take you through a step-by-step process on how to save your NBI Clearance online receipt manually. We’ve also attached screenshots of every step to help with easier navigation through the intuitive web page.
>>How to Apply NBI Clearance Online for 2021
The Process
The process of saving your NBI Clearance form online involves four major steps broken down into simpler sub-steps. To undertake the process, you need to
- Log in into your NBI Account
- Find and open the Print Information form
- Edit and make any necessary changes
- Save the Application form
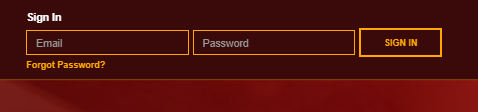
STEP 1: Login into your account
You have your account’s logins at your fingertip, right? The first step is to log in to your NBI Clearance account. In your computer’s search engine, visit the NBI Clearance Official website. Enter the email address and password you used to create an account. Click ‘SIGN IN.’
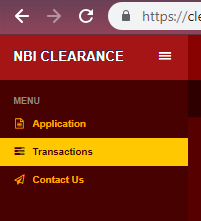
Step 2: Search for the Transaction Button
Clicking ‘SIGN IN’ will take you to the dashboard of your account. On the top right-hand side of the home page is a menu button. Below it is the Application and then Transaction tabs. Click on the transaction tab and wait for the new window to load.
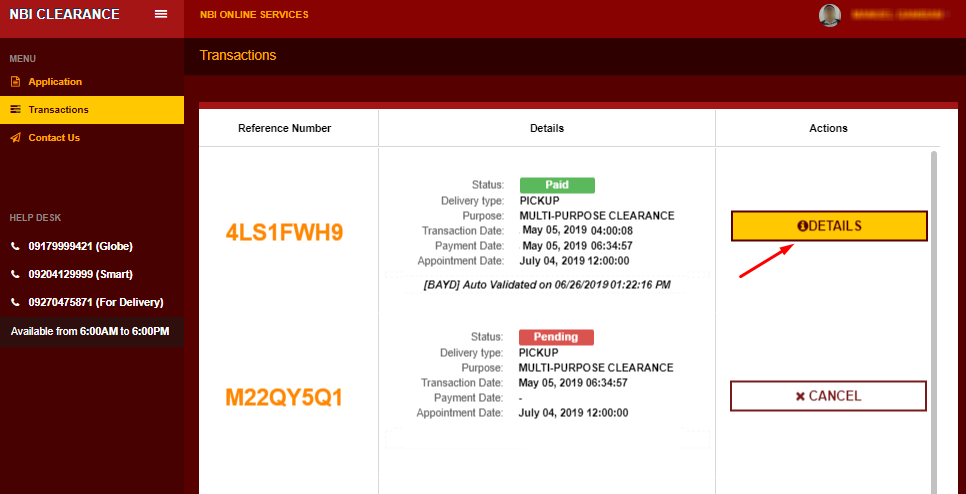
Step 3: Click on Details
Upon clicking the transaction button, a new page that details your paid and pending tasks will pop up. On the right-hand side of the mini-window is the red DETAILS tab. Click on it.
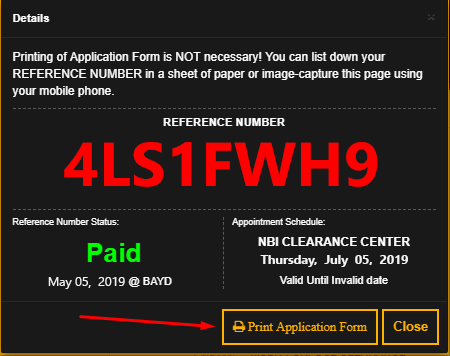
Step 4: Click on the Print Application form
A window detailing The Print Application form will once again pop up immediately after clicking the details tab. This is the same page where you can access your NBI Application Online Form’s Reference number. Click the Print Application button and wait for the next page to load.
Step 5: Follow the arrow to the green icon
In this section, you will see a glimpse of the final print draft. Just at the right-hand corner of the page is a green icon pointed by a yellow arrow. Click on the icon and wait for the next window to pop up.

Step 6: Click the save button
Finally, you’ll see the save button at the top left-hand side of the new window. Below it is a drop-down arrow. Click on it, and choose “Save as PDF”. In this format, the print-out is presented exactly how you laid it. It also has an edge over other formats for the quality of the final document in case you intend to print the soft copy.
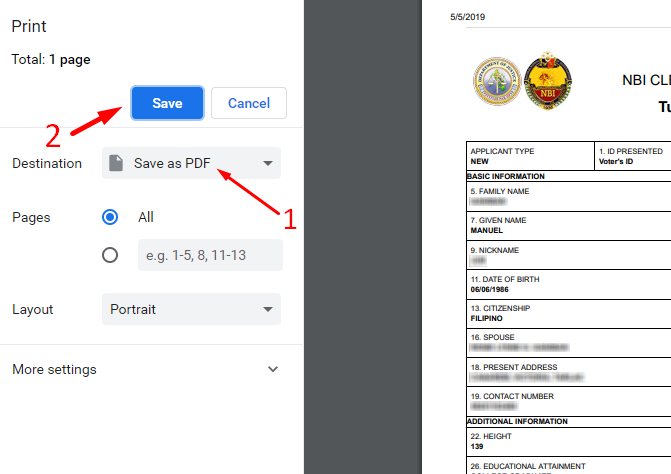
Step 7: Check “All Pages”
You intend to save everything, hence make sure to check the “all pages”.
Step 8: Select Portrait
Your receipt is primarily text. Hence you’ll need to save it in a vertical orientation for high-quality print-out. Portrait layout is your only sure bet.
Step 9: Press the Save Button
Once you are through with everything, click on the ‘SAVE’ button to download and save your receipt in your computing device or any external storage media.
Conclusion
Hurray..!
You are all done. Saving your NBI Clearance form isn’t rocket science, is it? We are almost sure that you won’t incur any problems in the process. If this is the case, however, feel free to ask any questions in the comment section. Also, check our blog for more information about NBI Clearance in and out of the Philippines.