Are you a foreigner living in the Philippines? Are you looking to acquire your NBI Clearance but aren’t sure of the procedure to undertake? Is the situation becoming overwhelming for you? Worry not, we’ve got you covered. Our article touches on all these. We’ll provide you with all the information you need to know about how to get NBI Clearance in the Philippines as a foreigner.
Table of Contents
Why Do Foreigners Need NBI Clearance?
As a foreigner living in the Philippines, the NBI clearance will prove to be a very crucial document. You will use it as proof to persuade law enforcement agencies in the country that you are not involved in any form of criminality.
The document signifies that you are of good morals, behavior, and respects the laws of the country. If you are a job seeker, you cannot be employed by any government institution or agency without the document. Other reasons why you need the NBI clearance as a foreigner include:
- For immigrant visa application
- For 13a Immigrant Visa renewal if you’re legally married a Filipino citizen. The non-quota Visa also applies for children sired inside the marriage. It allows them to live legally in the country and has to be renewed annually.
- For citizenship application after living in the country for more than five months.
What Do You Need to Acquire the NBI Clearance?
You will only need two documents:
- A valid passport issued by the Government of the Philippines, and
- An alien Certificate of Registration (ACR 1-Card)
The Process of Acquiring the NBI Clearance
The easiest way to get NBI clearance as a foreigner is through online registration. The process is an easy one and can be from the comfort of your home. It is pretty much the same as applying for the NBI Clearance as a Filipino with minor differences, as you’ll see later.
There are eight steps involved in the process:
- Registering an email account with the NBI website
- Creating a new NBI account
- Confirming of the OTP Message
- Filling in the Applicant Information
- Saving the Applicant Information
- Applying for Clearance
- Scheduling for an Online Appointment.
- Payment for the registration
- Processing your Application
Step 1: Register an email account with NBI website
All applicants receive their billing information as mail messages. Therefore, you will need to register a new email account with the NBI website.
Open your search engine. Visit the NBI Clearance Official Website to register your email account. Once you’ve added your address, proceed to create a new NBI account.

Step 2: Create a New Applicant account
Use the same website to sign in to your account. There are blank boxes for entering your email address and password. Fill “Yes” if you have an OLD account that you intend to renew. Then fill in the blank spaces with your credentials as they are in your I.D.s. Accept terms and services and check the “I am not a robot”. Then finally, click on the SIGN-UP tab. Click PROCEED to access the next page.
N/B if you do not have a middle name, you can write N.M. (Not Applicable) or MNU (Middle Name Unknown). Don’t also forget to confirm your old NBI Number when renewing the account since it may lead to an error message.
Step 3: Confirmation of the OTP Message
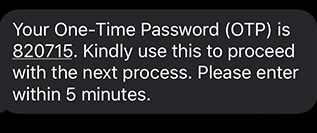
A One Time Password (OTP) will be sent to your phone or email address before accessing the site. The purpose of the OTP is to safeguard the entire application process. You’ll be surprised at how many spam application the site receives daily. Key in the six-digit code as it is. If you don’t receive the OTP, confirm whether you inserted the right details, then click on the ‘RESEND’ button.

Step 4: Fill in the Applicant Information
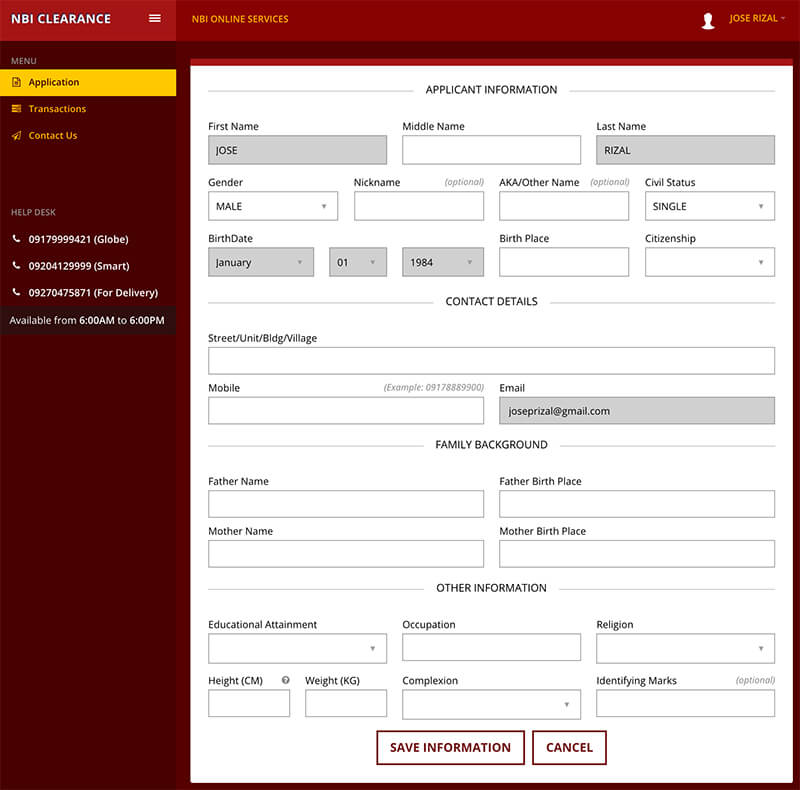
You will now be directed to the dashboard of your NBI account. At the top-right side of the application window, just below your name, there are two buttons: Apply for Clearance and Edit Information. Click on the ‘Edit Information’ button.
You will be presented with an Application Form, where you will be required to fill in your personal info. These are inclusive of your full names, place and date of birth, place of residence, and educational info, among others.

For accuracy, make sure to have the birth certificates for confirmation of your Parental Birth Dates and Names as they appear in their National Identity cards.
Step 5: Save the Application Information
Once you have filled the required details, click the SAVE INFORMATION button at the bottom of the page. The website will automatically display a summary of everything you have keyed-in. Double-check the details for proofing. If anything is wrong, click the EDIT INFORMATION button to review.
Step 6: Apply for Clearance
Immediately you click the SAVE INFORMATION button in step five, a new Clearance Application window will pop-up. Choose the type of I.D. you’d wish to use. Some of the available options include.
- Passport
- Voter’s ID
- SSS ID
- School ID
- Postal ID
- Tax Identification Number
For a foreign Individual, a passport and ACR-1 Card are your sure I.D.s. However, if you are renewing your NBI Clearance, the COPY of your Previous NBI Clearance form can be your ideal option. Press the “I Agree” button and proceed to the next step.
Step 7: Schedule for an Online Appointment
Congratulations; you are almost done with online registration. Once you are through with the online registration and details confirmation, the next step is to schedule for an online appointment. Scheduling for an online appointment only makes the process easier and quicker.
From the menu, choose a branch that is nearest and most convenient to you. Look for open slots (denoted by blue boxes). The slots vary from one NBI branch to the other depending on the volume of the tasks at hand. Red slots denote holidays when the Branch is closed.
In each day, there are slots for time- AM or PM.

Step 8: Payment for the Registration
After successfully scheduling for your online appointment, the next step will be to pay for the registration. There are seven payment methods to choose from. Pick the one that is most convenient for you.
- Bayad Center
- 7-Eleven
- Bank over the Counter
- Online Bank
- Payment Center Outlets
- Pay Center Mobile App
- ECPay
Below the compiled appointment sheet, you will see the “Choose the payment method” bar. Click on your preferred method. A reference number will pop up. Jot it down. You will present it later to the Branch you chose above for validation.

The status of your Online NBI Clearance should now change from PENDING to PAID.
Step 9: Processing your Application
This is the last step of your application process. It involves you availing yourself to the NBI Clearance Branch as per the stated date and time. When visiting the NBI branch, ensure that you carry with you two valid Identification (I.D.) Documents and your NBI Reference Number.
The preferred valid I.D. for foreigners is the Philippines Passport. Once you are at the NBI Clearance Main Office:
- Fill up the Alien Registration Form No.5 at the Registration Desk
- At the Biometric Counter, submit the Filled Alien Registration form and have your fingerprints, biometric, picture and digital signature taken.
- At the Next counter, submit the documents from counter 2. Wait for the NBI personnel to give you a manual signature and fingerprint.
- At the last counter, you will be informed of when to claim your NBI clearance form. The personnel at the counter will print the date at the back of your online receipt.
Claiming your NBI Clearance
Unlike Filipino citizens who can get their clearance in a day, foreigners in and outside the country can only claim their clearance forms after six days. Also, the NBI Clearances are only issued at one specific Branch: the NBI Clearance Main Office at U.N. Avenue, Ermita, in Manila.
Conclusion
Congratulations! You now have your NBI Clearance. The process isn’t a difficult one, and we are sure that you will not have any hitches in the process. Remember, having an NBI Clearance as a foreigner in the Philippines is very important. If you don’t have it, make haste to acquire one.
Let us know your thoughts in the comment section. Also, if you have any questions, feel free to reach out.
